Christmas Ornaments
by Scott This is a bit of a belated Christmas post about our new 2010 ornaments. Tina and I have started a family tradition of making new ornaments each year to hang on the Christmas tree. I hope that some day we’ll be able to decorate the tree and each ornament will be connected to a special memory. This will be our third year to do the tradition and each year we have used a different material.
2008: Our first year making ornaments we made ceramic ornaments at the local ceramic store. They made everything very easy. They had a wide selection of un-decorated “bisque” ceramics in all shapes and sizes ready to be painted. Once you paint them with a chalky glaze paint they’ll need to be fired in an oven. The local ceramic store had everything we needed: we picked out the ornament shapes out and painted them right there. A few days later we picked them up after they had been fired in an oven. They turned out great; see the gallery below.
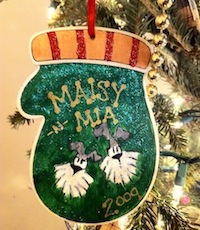
2009: The following year we choose to go with simple wood ornaments. They sell various shapes at the local craft stores and along with a set of paint pens we were ready. These were the easiest to make so far, and I’d expect them to last the longest.
2010: This year we wanted to do stained glass, but we don’t know anything about glass making. Instead of real stained glass we used painted glass that when it dries it has a stain glass look. We picked up some plain clear glass ball ornaments at the store along with a paint kit. The kit had several colors along with a bottle of liquid leading which is a thick black paint that when dries resembles the lead joints seen in stain glass windows.
To make the painted glass ornaments we had to do a two-step process. The first day we used a China Marker to draw an outline on the glass. Next , we used the liquid leading to draw a beaded line along the outline. The liquid leading requires at least 8 hours to dry. So we left them to hang in the closet. The next day we came back and painted color in between the shapes created by the leading. To paint the color you just use a special tool that comes with the paint kit to scoop paint into the area. You fill up the entire area pushing the paint to cover all the areas. It requires more paint that you expect; it thins out as it dries translucent. The color paint requires another 8 hours to dry then they are ready to hang on the tree.

